Thursday, 14 April 2011

Inside my Parents House

So as you know I was in Wales for the past few days visiting my lovely Ma and Pa, helping them around the house and with the ponies, but more importantly SHOPPING!  Yes we had a wonderful time in the YMCA shop, several fantastic and huge pound shops and of course a range of charity shops.  I got many bargains including some rather wonderful vinyl number stickers for my recycling bins featuring some fishing gnomes!  What could be better?
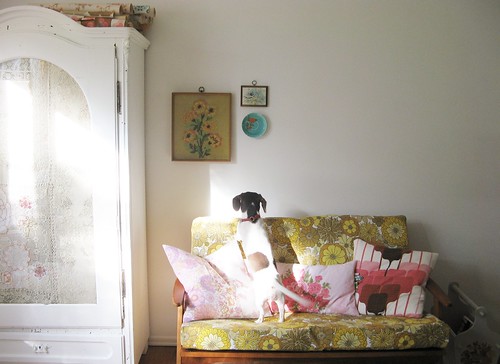
Anyhow while I was at my mum and dads house I observed some of the lovely artefacts they had round the house and thought it might be lovely to share some of them with you for you all to enjoy.

This is a painting by an artist friend of my parents called Terence Clarke,they have a few of his paintings which are all really beautiful:


An Orchid that I moved to the work surface in the kitchen:


A selection of old artefacts inherited from mu grandparents:


A vase of poppy heads and two small ceramic vases/pots that I made and gave to my mum as a present:


Hope you are all having a good week, I will hopefully have a tutorial for you all to enjoy tomorrow.  Anyone doing anything exciting over Easter?
 

Wednesday, 13 April 2011

Falling in love with Mid-Centry Modern

It has only been since I started blogging that I have developed a taste for Mid-Century Modern interiors. My interest has been sparked in part with thanks to the likes of Dottie Angel and sfgirlbybay and thier beautiful homes, but I also think it is something to do with being my age and being able to look back to things from my childhood in a new light.
Yesterday my lovely mum and I went thrifting and visited the YMCA shop in Swansea.  Can I just say AMAZING!  If I had a bigger house I would definately have left there with some fantastic pieces of furniture, at the very least a sideboard, a dressing table and some chairs.  As it stood I left with two glass jugs and a hair band!

Take a look at these gorgeous photos to whet your appetite for Mid-Century Modern:


Sunroom_large


Seonna_hong

Frame wall


Oooh yeah

What do you love?

Friday, 8 April 2011

Holiday bliss

Oh joy, oh rapture!  It is finally the Easter holidays, 15 days of work-free bliss, then another two days for the Royal Wedding!  Yipppee! What could be better?  And I feel I truly deserve it, I am totally and utterly exhausted, the past week has been stressful and hard work I really am just going to enjoy myself and relax over the coming two and a bit weeks. Things I am looking forward to include seeing my lovely family, walking on the beach, going to the allotment, sleeping in, Easter (and chocolate of course), more art and craft projects, going places with my hubby and seeing friends.
But right now I am off for a shower and a loooong sleep.
Night night everyone
x

Wednesday, 6 April 2011

A Photo An Hour

Today I took one photo per hour from 7am to 7pm.  So here is my day in photos:

7.00am - It's a sunny day, yippee!  Putting the washing on the line after waving my husband off on his way to work.  So housewifey! p.s. the sky was really blue, didn't show on the camera.


8.00am staring on a project that I am going to post a tutorial on when I have finished.


9.00am Put the piggies out in the garden , the light is beautiful, still working on my little project,


10.00am starting a loaf of bread off,


11.00am My tomatoes happily growing in the sun, sitting on the floor, listening to Jack Johnson and Red Hot Chilli Peppers, still working on my project,


12.00pm off the the allotment to do some weeding, want to plant some onions, four a dead mouse under the black plastic, worried that I stepped on it,


1.00pm Didn't plant the onions, or do much weeding, stood talking to my allotment friend David for about an hour!


2.00pm back from the allotment, put the piggies out on the grass and clean out their hutch, keep working on the project,


3.00pm enjoying the sun, working outside in the garden, no need for a cardie because it's so hot, just staring to go pink from standing in the sun too long, oops!


4.00pm using tissue paper on my project, kneed loaf to prove a second time, watching the second Sex and the City movie.


5.00pm making dinner for the hubby and me, first bbq of the year, with this delicious salad!


6.00pm bread ready and out of the oven. 


Had a really lovely day today, enjoying he sun and doing a little craft project, Easter holidays next week!  Yippee, got lots of blog posts in mind for the coming weeks.  Can't wait to relax and enjoy myself, visit friends and see my family. ttfn!


Wednesday, 30 March 2011

Retro Wreath Tutorial


Hi everyone, hope you are all having a lovely week, welcome to some new followers this week, thanks for enjoying my blog and paying a visit.  It feels like it has been a really long week to me so far, it is going very slowly.  I am sure before I know it the week will be over, I guess I am just counting down the days till the Easter holidays!
Anyway, I promised ages ago that I would share a tutorial on how to make one of my wreaths like these:


Well I have finally gotten round to making another one, any remembered to photograph it along the way, (although it has taken me three days!) Here goes:

1. Gather together everything you need:

PVA glue,
polystyrene ring,
assorted fabric,
Assorted yarns and string,
buttons,
ric rac (or other ribbons and lace)
Scissors,
Pins,
Needle and thread,


2. Cut your fabric to a length that will go round the girth of the hoop with a little extra to spare, the width is up to you.  In this wreath I used 7 pieces of fabric in varying widths and patterns.

3. Iron a fold in one of the short ends of your fabric.


4. Sew a hem along the short end. (You don't need a sewing machine, but it is quicker):


5. Paste PVA glue directly onto your polystyrene ring the pull your fabric round it so that the hem is on the inside of the ring to the back. You will need to pull and stretch the fabric so it lies flat against the ring with no wrinkles.  Pin it into place along the hem.  (You will find that the hem is curved, this is fine)


6. Continue this process with all the fabric, leaving gaps in-between each piece.  Pin every bit and makes sure you always keep the hem in the inside to the back. 


7. Put PVA onto the ring in between the fabric and pin your yarn or string onto the ring.  Wrap the yarn or string round and round the ring until you have filled the gap.  You may find it easier to cut the yarn or string into smaller lengths, this is fine so long as you make sure every piece is pinned to the ring at the start and end:


8. Continue this process all the way round the ring till you have filled all the gaps with yarn or string:


9. Next you need to create four Suffolk Puffs for the flowers on your wreath.  To do this, use a template to cut a circle of fabric in a coordinating colour (I made one large white circle, two small white circles and on patterned small circle to layer on top of the large one).  I drew round a bowl as my large template and some tape for my three smaller circles.


10. Next, sew a running stitch round the edges of your circles and pull the ends to gather the fabric together and make the puff. Tie a knot in the thread to secure it:


11.  Repeat this process with the smaller circles.  

12. Now sew a button onto the centres of the puffs.  I like to have my puffs ruffly side up:


13. Next glue the three puffs onto the ring with a blog of PVA, pin in place until dry.


14. Leave your ring for a few hours, until the glue has dried and then remove all the pins.   Hang your wreath with a piece of raffia or other coordinating yarn.  Here is your finished ring:


I think you would need to set aside about two or three hours to make this wreath, not including drying time.  If you love this wreath but don't have the materials or time to make it yourself, then pop over to my shop and your can purchase this very ring for yourself.

If anyone has a go at making this wreath or something similar I would love to see it, so do drop me an email.  Plus let me know if yo think this is a good tutorial or how I can improve it.

Have a wonderful day.
Helen
x

Monday, 28 March 2011

Winner!

Hey everyone,

I am happy to announce that by the power of the random number generator:


the winner of the postcard artwork is Bex of Futures, Well done Bex!

These will be winging their way to you very soon:


If you are desperately sad to have missed out on this giveaway but love the cards so much that you simply have to have them in your possession then mosey on over to my shop and you can purchase them for a very reasonable price. 

At the moment I am in the process of creating a tutorial for a wreath and am trying in vain to learn to crochet a flower via Youtube.  Not an easy task for someone as inpatient as me I can tell you right now.  Can't wait to share the tutorial with you once it is finished though.

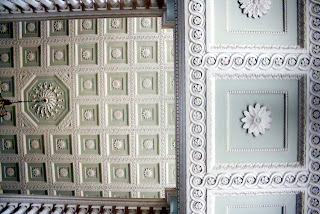
In the mean time please delight yourselves in these photos of our weekend visit to The Vyne, National Trust property that I visited with my Aunt and hubby on Saturday:


Hope you have all had a fabby start to the week.

Helen
x